The Science of Duo in Space, Pt. 2: Let’s Go to Work
Previously: Our mad scientist of Duo in Space, Duo Labs' Senior Security Researcher Mikhail Davidov, introduces this experiment attempting the first Push authentication from the edge of space, considers some of its challenges and runs down the components essential to assembling and tracking the payload.
Cut It Out
Once we ordered the components and they started trickling in, I began building. First on the list was the cut-down device to sever the rigging. I decided to follow the same design that I used in previous launches with Hackerbot Labs. It centers on an ATtiny85V microcontroller and a large power transistor to act as a timer and dump a large amount of current through a coil of nichrome wire wrapped around the rigging.
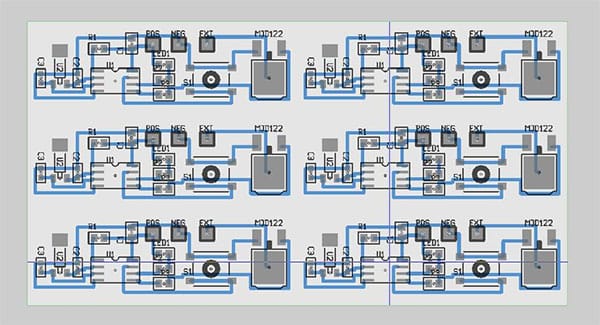
I went to Metrix Create:Space to have the printed circuit board manufactured on their amazing LPKF PCB laser.
The six boards were assembled, flashed with firmware and tested while all still attached together.

After checking that the electronics were working properly, it was time to test the cutting mechanism. I carefully cut apart the boards on a bandsaw, strung a traffic cone from my ceiling and verified that it could actually cut the rigging.
Listening to Hear Where You Are
Radio direction finding is a means of determining from which direction a signal originates, relative to a receiving antenna. Typically, it’s performed by sweeping highly directional antennas with sets of attenuators attached, which can be quite cumbersome to do from a moving chase vehicle.
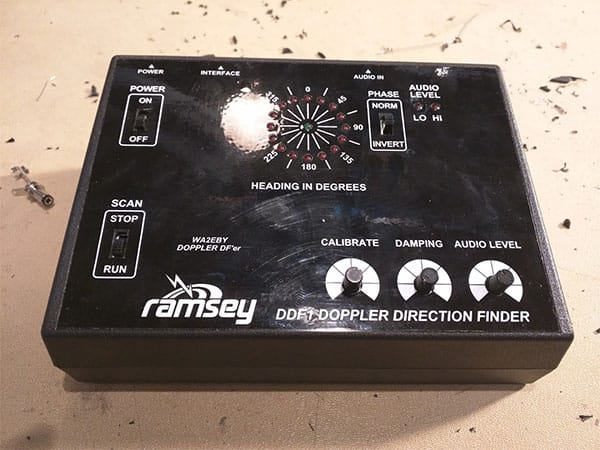
One alternative to that method is to simulate the scanning process of the Doppler effect, which I achieved with four carefully placed antennas — no moving parts required! I found a kit online of a popular Doppler direction finder circuit and spend several days assembling and testing it.
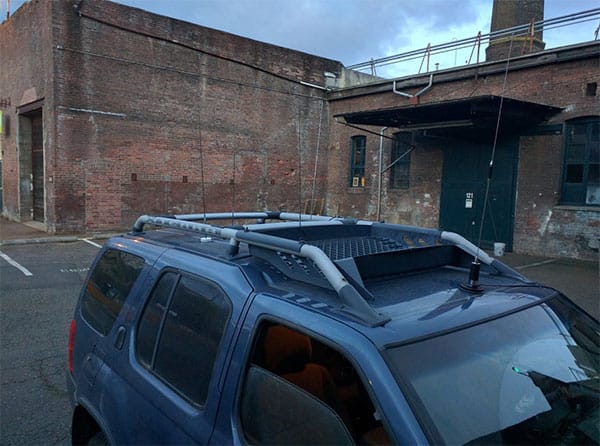
After turning my car into an antenna-covered porcupine, I turned on the beacon and drove around to see how well it performed. With the other means of tracking relatively self-contained, I moved on to developing the software stack. During a trip to Duo’s Ann Arbor headquarters, I clobbered together a set of Python scripts for the Raspberry Pi that would share a network interface over the onboard Wi-Fi chipset and monitor the traffic. Because I wanted this to be as authentic as possible, I didn’t want to make any modifications to the actual Duo Android app. I had to find a way to fingerprint when a Duo Push actually arrives on the phone.
Once a push arrives over Google Cloud Messaging to the phone, the application connects back to Duo’s API endpoints to retrieve transaction details. While I couldn’t decrypt or interact with those details, I could intercept the TLS handshake messages and parse out the domain names. This gave me a means to trigger an actuator whenever the Duo app reached out over the internet to load a push.
I gathered all the necessary office supplies to test this end-to-end: a thumbtack, a pen, some paper clips and a bit of sponge.
With the software stack starting to take shape, I 3-D printed a simple linear actuator from [Thingiverse](https://www.thingiverse.com/). To give it a little more form, I also printed a prop severed finger and attached it to the linear actuator.
I tried embedding a stylus inside the finger to act as the touch screen effector, but it proved unreliable. Ultimately, I coated the fingertip in foil and tied it to the Raspberry Pi’s ground, which worked surprisingly well.
You're Hot, Then You're Cold
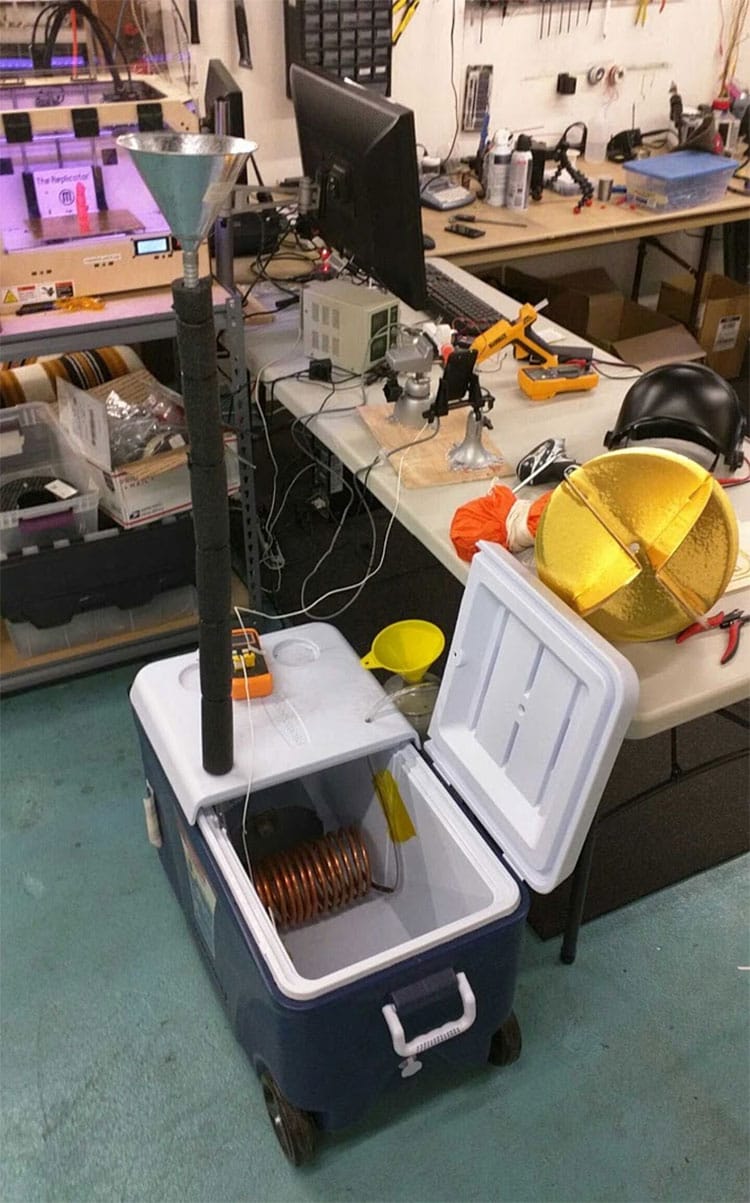
By the time this was built, I wanted to start testing how the phone and actuator would handle the cold temperatures, because they would be outside of the protective insulation of the payload body. My main concern was that, even with the backlight at maximum brightness, the display would freeze and be destroyed. To cool down to -76 degrees Fahrenheit in the middle of a Seattle spring, I constructed a cold testing chamber. With a familiar Hackerbot Labs design in hand, I headed to the hardware store to get the necessary components to quickly clobber one together.
By having a ventilation fan blow across the surface of a copper coil flooded with liquid nitrogen inside of a cooler, I could get the interior temperature from ambient down to -60 degrees Celsius in a little more than 20 minutes.
I went to the local welding supply store with a special 35 liter dewar that could hold the -200 C liquid nitrogen for up to a month and had it filled. To save on the relatively expensive liquid nitrogen and speed cooling, I also purchased a few pounds of dry ice to line the bottom of the chamber.
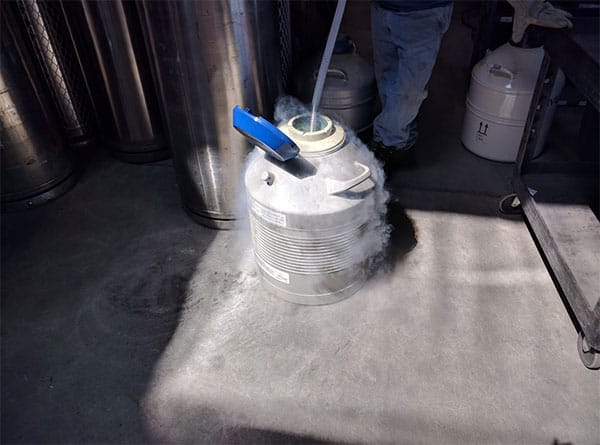
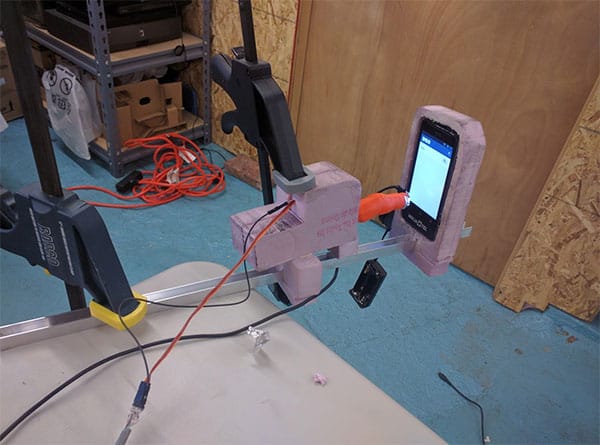
Back at the lab, I mounted the phone and actuator in a vise and attached them to a wood plank. The assembly went inside the chamber, on top of a bed of dry ice, and I attached two thermocouples to monitor the temperature. One was attached to the body of the cooler to monitor ambient temperature, and the second to the screen of the phone.
Closing the lid, the exhaust fan turned on and liquid nitrogen poured into the chamber inlet. The temperature quickly started to plummet. At around -20 C I could hear the servo start struggling to move, and it wasn’t long before it stopped altogether. Its gears had completely frozen. Surprisingly, the phone continued to work until the screen temperature hit approximately -30 C and the phone shut off.
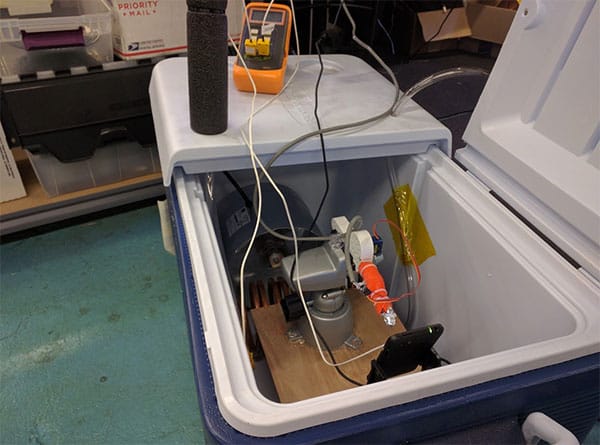
As I lifted the assembly out of the the CO2 atmosphere of the cold chamber, moisture in the air condensed across the parts and turned into a frost. From this experiment I knew that insulation was absolutely called for. Because I used a low-quality servo, it was constantly moving to try to find its set point, generating heat in the process.
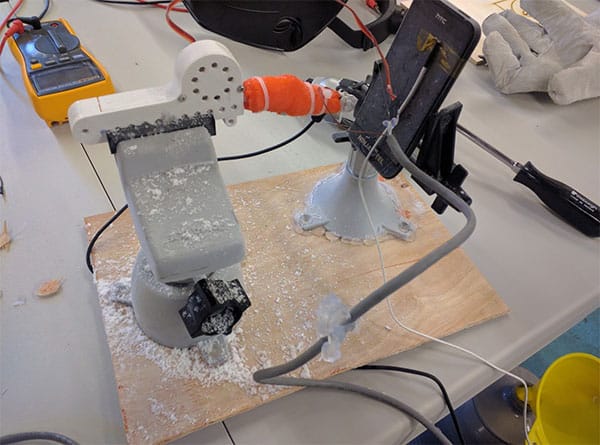
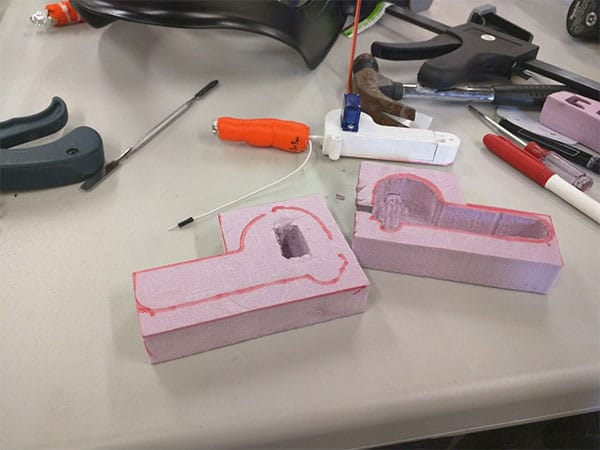
I figured that simply insulating it in a sheath of insulating foam would do for the test launch. I routed out a cover for the actuator and glued it together.
The phone posed a different challenge. Its surface area producing the most heat, the screen, had to be exposed. Being extremely power-efficient devices, smartphones don’t produce much waste heat, so I had to find a way to actively heat it. Often for balloon launches, people throw a chemical hand warmer or two into their hull. This is a really poor choice for a number of reasons. For starters, the chemical reaction which produces the heat is activated by the presence of oxygen; consequently, as your altitude increases, their temperature decreases. Secondly, water is a byproduct of this reaction, which can cause camera lenses to fog up.
Instead, I found a cheap pair of AA battery-powered boot warmers for sale online and embedded them into a foam phone holder. This should have allowed the phone to keep warm enough during the ascent. It ran the risk of overheating the phone at peak altitude or during descent, but without this tweak it wouldn’t make the journey at all.
Getting in Shape
With these housings made, I attached them to a bit of aluminium C extrusion to act as a rigid rail.
After attempting to freehand the hull out of foam sheets and failing miserably, I turned to CAD and made cut templates.
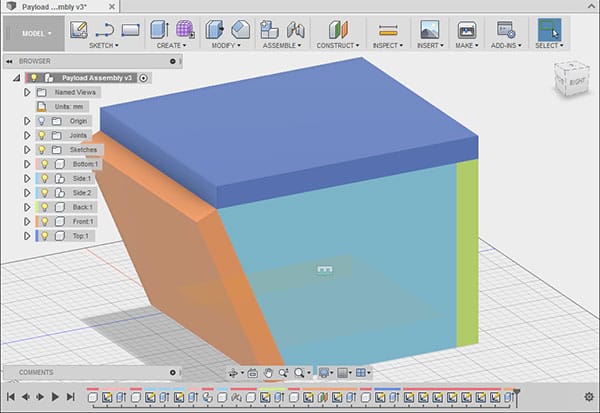
The laser cutter here had no trouble cutting the one-inch thick foam with minimal burning. Very quickly, I had a the right box shape and pinned it together while everything was being laid out.
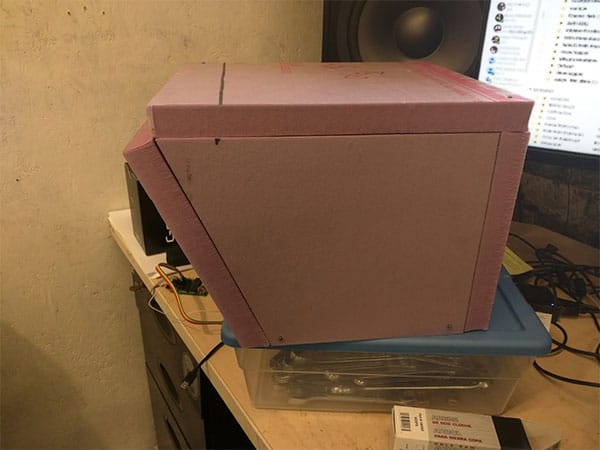
Next, I started making cuts for the various camera angles, antennas and phone rail.
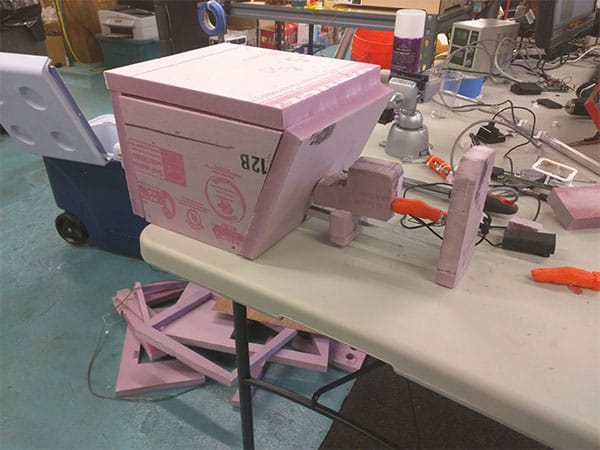
The cameras would be mounted to the inside of the foam with a conical cutout for the lens to stick into.
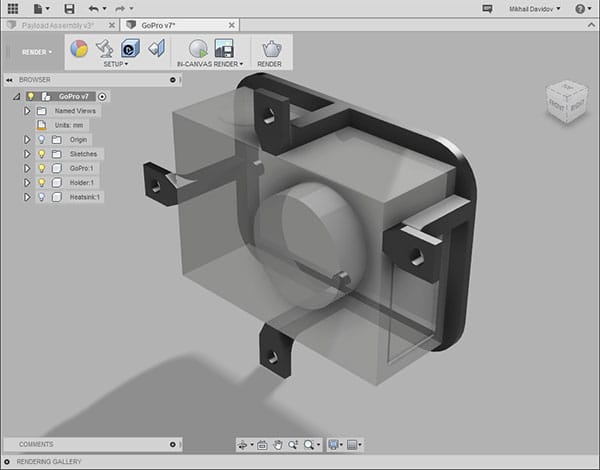
However, due to the wide angle of the lens, the vignetting required a significant amount of material to be removed, weakening the structure and compromising the attachment points.
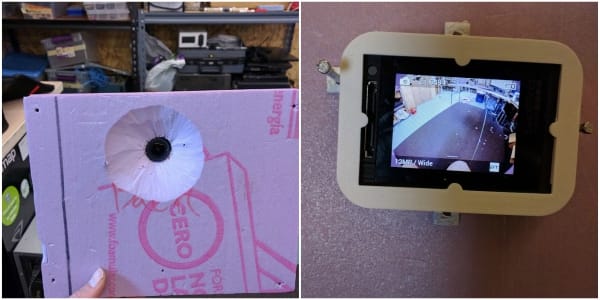
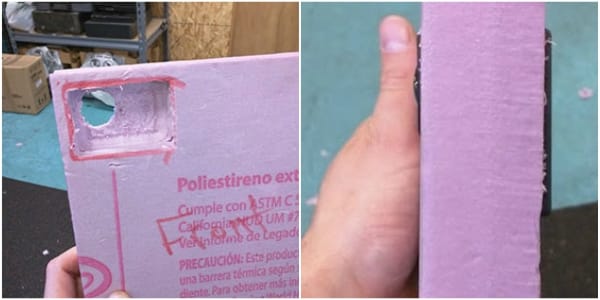
Due to this discovery, I abandoned the mounting design. I laser cut new pieces and carefully hand routed out inlays in the foam so that the camera’s lens would be flush with the exterior of the body. This decision would come back to haunt us later.
On the SPOT
With the camera placement seemingly solved, I moved on to the next challenge of the build: a gimbal for the SPOT satellite tracker. This device ensures that the little black puck that is the SPOT always faces upward. Designing and iterating on this took far longer than expected, but it was a critical flight component.
![]()
I 3-D printed the parts and solvent welded them together. Because there wasn’t room for it inside the payload hull, I planned to mount it on a rod going through the payload. The rod would also serve as the primary rigging point for the payload and act as an antenna mast, keeping the APRS-transmitting antenna away from other radio components.
![]()
For the audio buzzer, I opted for a low-voltage alarm typically used by quadcopter pilots, wiring it to immediately start emitting a tone. Having only a single AA battery holder left and needing more voltage to power the alarm, I glued an additional AAA battery pack to its side. It came together looking like a pretty nefarious device.
## Finishing Touches
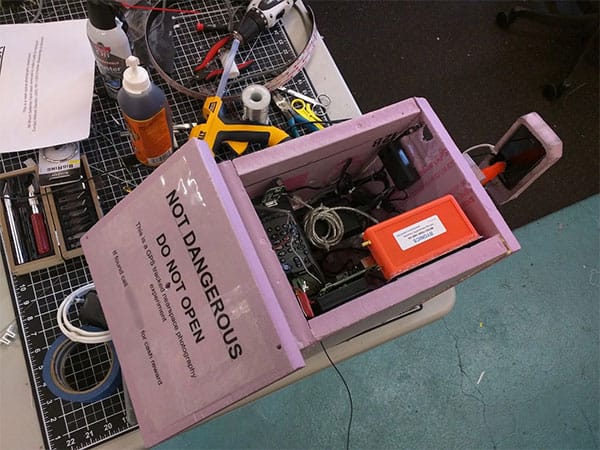
At this point, all of the hardware components were done! I eagerly mounted these pieces inside the payload with 3M’s amazing Dual Lock tape and hot glue. Next, I made power wires for the GoPros and routed them around the hull. Then, I added a label to the top of the box with contact information in case we ended up losing it. With that, the payload was physically ready.
All that remained after that was to get the satellite link working. I modified the Raspberry Pi scripts to use the satellite phone to periodically go online and wait to receive a push notification. That’s when I hit a huge snag. I could establish a connection, but after only a few packets of back and forth it died and went silent — it couldn’t stay connected.
With the test launch rapidly approaching, I had to proceed without data connectivity and without actually attempting to send a push to the payload. While this was less than ideal, during the test launch we’d could still test the tracking and filming equipment, and even most aspects of the software stack. I changed the Raspberry Pi scripts to just continously poke the screen with the actuator every minute.
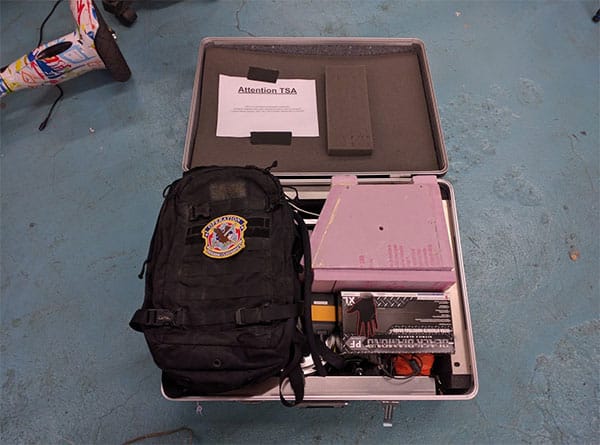
I packed everything we needed to launch and track the balloon (except for a helium tank) into a hard case and boarded a flight to Las Vegas. In a little more than 30 hours, this finger-wielding pink box was bound for the stratosphere!
Up next: The test launch

