Contents
Duo Identity Security provides you with insights, signals, and remediation features across your multi-vendor identity environment.
Overview
Duo Identity Security combines Duo’s strong attack mitigation and remediation capabilities with cross-vendor identity insights powered by Cisco Identity Intelligence.
Cisco Identity Intelligence
Cisco Identity Intelligence (CII) is a multi-sourced, vendor-agnostic solution that works across your existing identity stack and brings together authentication and access insights, enabling you to proactively address vulnerabilities and risks in your multi-vendor identity environment.
All Cisco Identity Intelligence features and capabilities are included in Duo Identity Security for Duo Premier and Duo Advantage customers.
Learn more about Cisco Identity Intelligence.
Requirements
The requirements for provisioning Cisco Identity Intelligence are:
- A Duo Premier or Duo Advantage plan.
- A Duo administrator with the Owner role.
Additionally, everyone in your organization whom you want to be able to access the Cisco Identity Intelligence console via Duo Single Sign-On should exist as an end-user in your Duo account and your SAML or Active Directory authentication source.
If you are using Active Directory Sync or Microsoft Entra ID Sync, Cisco Identity Intelligence will use the source directory's unique identifiers to associate Duo identities with matching identities in other vendors.
If you are not using Active Directory Sync or Microsoft Entra ID Sync, an email address will be required for the username or email field for your Duo users in order for Cisco Identity Intelligence to map Duo user identities to corresponding identities in other data integrations. The email address used in Duo must match an email address in another integrated platform (e.g., Okta, Google Workspace, AWS).
Provision Your Cisco Identity Intelligence Tenant
-
Log on to the Duo Admin Panel as an administrator with the Owner admin role.
-
Navigate to Monitoring → Cisco Identity Intelligence.
-
Review the information on the "Cisco Identity Intelligence" page. If you agree to the terms, check the box, and then click Submit and start setup.
-
Duo will automatically provision your Duo integration with Identity Intelligence to enable your new Identity Intelligence tools to consume and analyze Duo user and authentication data.
-
Next you'll configure Duo Single Sign-On to log in to the Identity Intelligence panel.
-
If you already have Duo SSO configured, we’ll enable Duo SSO by default for seamless access. Click the Connect your Cisco Identity Intelligence button to continue.

-
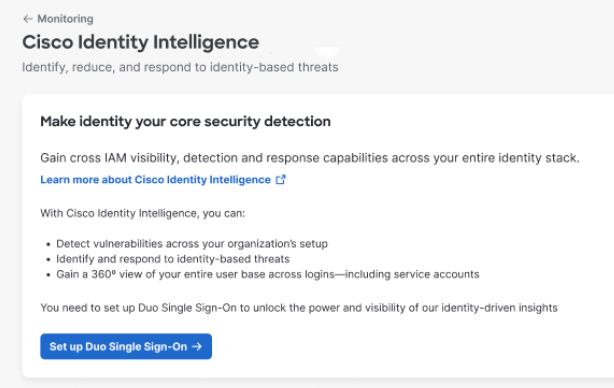
If you do not have Duo Single Sign-On configured yet, you will need to enable Duo Single Sign-On for your Duo account and configure a working SAML or Active Directory authentication source to access your Identity Intelligence tools. Click the Set up Duo Single Sign-On button to configure your authentication source.
-
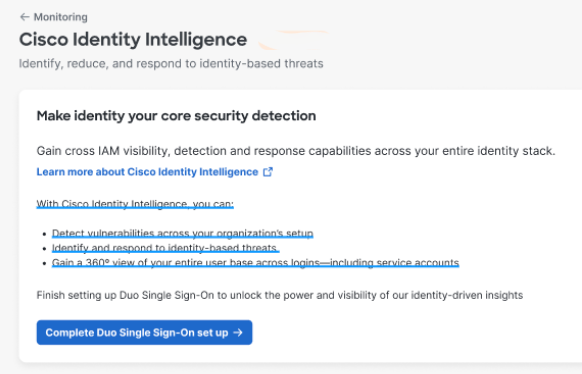
Once you’ve completed setting up Duo SSO, click the Complete Duo Single Sign-On set up button.


-
Admin and Security Analyst roles can not access your Identity Intelligence dashboard until you grant access. Locate your Cisco Identity Intelligence SSO application in the Duo Admin Panel's Applications page. The name of the SSO application specified in step 6 or step 7, and the type of application is "Cisco Identity Intelligence - Single Sign-On". Click on the application to view its details.
-
In the "User access" setting, select one of the following options:
- Enable only for permitted groups - Only select groups can access the CII dashboard. The administrators in the permitted groups can sign in to Cisco Identity Intelligence via Duo SSO. Administrators not in a permitted group receive an access error.
- Enable for all users - Duo administrators with any role assigned can access the Identity Intelligence dashboard.
-
Click Save.
-
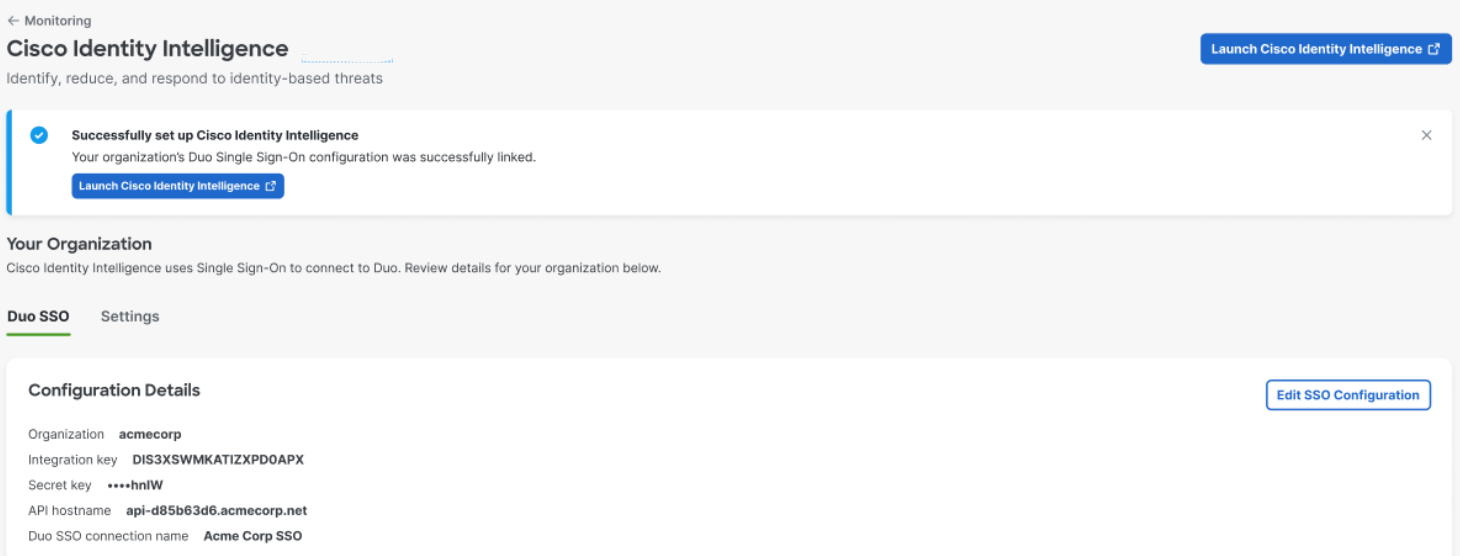
You can now use your Identity Intelligence tenant. A Launch Identity Intelligence button will appear on this page that will launch the Identity Intelligence dashboard from the Duo Admin Panel. Duo administrators with any role assigned can access the Identity Intelligence dashboard via Duo SSO. Make sure that any Duo admins accessing Identity Intelligence also exists as an end-user in Duo and in your identity source for SSO.

Next Steps After Provisioning
Data ingestion and analysis of Duo data begins automatically after provisioning. Depending on how many identities exist in your environment, it can take a few days for all the data in your environment to get fully synchronized in the Cisco Identity Intelligence tenant. Learn more about Cisco Identity Intelligence.
Create Additional Integrations
Set up additional available integrations to maximize the cross-vendor visibility that Cisco Identity Intelligence provides and to ensure protection of your full identity ecosystem.
Integrations
Cisco Identity Intelligence can integrate with a number of vendors for data ingestion, ticketing, notifications, and SIEM usage.
You can read more about the integrations and find configuration instructions by following the links below.
Cisco Identity Intelligence can ingest data from the following sources:
- Auth0
- AWS
- GitHub
- Google Workspace
- Microsoft Entra ID
- Microsoft Entra ID Event Hub
- Okta
- Salesforce
- Workday
Additionally, integrations are available for notifications, ticketing and SIEMs:
Troubleshooting
Need some help? Take a look at our Identity Security Knowledge Base articles or Community discussions. For further assistance, contact Support.
